Manage data links
- Home
- Resources
- User manual
- Data visualization
- External data links
- Manage data links
Data links are available with thinkcell Suite and thinkcell AI Suite.
This page explains how to manage data links between PowerPoint and external data sources (see Excel data links and Tableau data links). Here's how you can manage the data in linked elements in your presentation:
- Update individual linked elements with new data.
- Manage updates for multiple linked elements in your presentation at once.
- Change the data sources of linked elements.
- Data links terminology
- View linked data source information
- Manually update linked elements
- Automatically update linked elements
- Revert updates to linked elements
- Manage multiple linked elements using the Data Links dialog
- Alternate data sources
- Troubleshoot data links
- Remove data links
- Manage data links in thinkcell Essentials
- Excel data links FAQ
Data links terminology
The following table defines specific terms that appear on this page.
|
Term |
Definition |
|---|---|
|
Alternate data source |
A workbook or worksheet that thinkcell recognizes as a match for an element that's currently linked to a different workbook. For example, thinkcell identifies an alternate data source after you change the name or location of a workbook (see Alternate data sources). |
|
Automatic update |
A data update option where a linked element automatically updates with new data whenever thinkcell detects changes in the linked Excel range (see Automatically update linked elements) |
|
Data link |
The connection that lets you update a thinkcell element in PowerPoint with data from Excel or Tableau |
|
Data source |
The Excel workbook or worksheet, or the Tableau view, that contains the data that's linked to an element in PowerPoint |
|
Linked Excel range |
A cell range in Excel that provides the data for a linked element in PowerPoint |
|
Data link frame |
The frame around a linked Excel range. The frame's color indicates the data link's status. |
|
Revert |
A data update option to undo the most recent data update to a linked element and load its previous data set (see Revert updates to linked elements) |
View linked data source information
When you select a linked element on a slide, the following information about its linked data source appears above the element:
- If the element is linked to Excel, the name and file path of the Excel workbook, and the name of the worksheet that contains the linked data range.
- If the element is linked to Tableau, the URL of the Tableau data source.

In this example, thinkcell links the chart to a linked range in the worksheet Sheet1, in C:/Users/Public/Marketing Metrics January.xlsx.
Manually update linked elements
By default, elements that are linked to Excel update manually. When an element has new data in its linked Excel range, the selection frame around the element turns green, and the Update  button appears above the element.
To update the element with the new data, select the element, then select Update . Alternatively, on the mini toolbar, select Update Once  .
.
To switch a linked element from automatic to manual updates, select the element to open its mini toolbar, then select Disable Automatic Updates  .
.

To update an element that's linked to Tableau, select the element to open the mini toolbar, then select Update Manually  .
.
Note: If you Revert updates to linked elements, the Update button disappears until the linked Excel range changes again, and the update button changes to Update Once .
Automatically update linked elements
thinkcell can automatically update linked elements whenever their linked Excel range changes. To turn on automatic updates, select the element to open the mini toolbar, then select Update Automatically  .
.
As long as thinkcell can connect to the linked Excel range, any changes in the linked Excel range will automatically appear in the linked element (see Troubleshoot data links).
To turn off automatic updates for a linked element, select the element to open the mini toolbar, then select Disable Automatic Updates or Revert  .
.
Note: thinkcell can't automatically update linked elements that are linked to Tableau (see Tableau data links). If your selection includes an element that's linked to Tableau, when you select Update Automatically , thinkcell updates the element once.
Revert updates to linked elements
To undo the most recent data update to a linked element, select the element to open the mini toolbar, then select Revert . You can only revert updates that you've made since you opened the presentation. If you close and reopen a presentation, you can't revert updates that happened before you closed it.
When you revert updates to elements, their selection frame turns blue and the Update button disappears until the linked Excel range changes again. To redo a data update, select the element to open the mini toolbar, then select Update Once . You can switch between the most recent data update and the previous data this way even if the element has a broken data link (see Manage broken data links (  )).
)).
Manage multiple linked elements using the Data Links dialog
When you have many linked elements in your presentation, managing their data individually can be impractical. The Data Links dialog provides an overview of all data links in your presentation. Use the dialog to manage the data for multiple linked elements at the same time.
To open the Data Links dialog, do any of the following:
- On the PowerPoint ribbon, go to Insert > thinkcell Data, then select Data Links
 .
. - On the PowerPoint ribbon, select Insert > thinkcell > Tools
 .
. - Select a linked element, then select the data source information above it. Alternatively, on the mini toolbar, select Open Data Links Dialog .


The left side of the dialog displays the linked elements in the presentation as follows:
- Slides that contain linked elements appear as slide thumbnails.
- In each slide thumbnail, linked elements appear as gray placeholders.
- Elements that have a pending update have the green update icon on their placeholders (see Manually update linked elements).
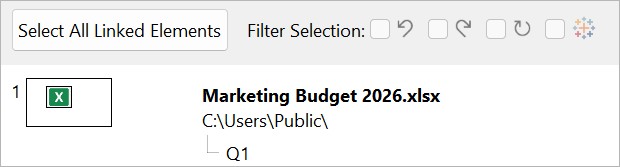

The right side of the dialog lists the data sources for linked elements as follows:
- Each data source appears next to the first slide that contains an element linked to it.
- Excel data sources are grouped by workbook. The workbook file name and path appear first, followed by the worksheets that contain the linked elements' data.
- Tableau data sources appear as URLs (see Tableau data links).
When you hover over an element placeholder, thinkcell highlights the element's data source. A tooltip displays the worksheet's name, the workbook's file path, and the element's current update status.
In the Data Links dialog, you can update, revert updates, or turn on automatic updates for multiple elements at once. You can keep the dialog open while you edit your slides and linked data.
- In the Data Links dialog, select the elements whose updates you want to manage. Read more
To select multiple linked elements, do one of the following:
- Select all elements linked to a data source: Select the data source in the right column.
- Select all linked elements on a slide: Select the slide thumbnail.
- Multiple selection: Hold Ctrl, then select multiple element placeholders, slide thumbnails, or data sources.
- Adjacent selection: Hold Shift, then select a range of element placeholders, slide thumbnails, or data sources.
- Select all linked elements in the presentation: Select Ctrl+A or select Select All Linked Elements.
- If needed, filter your selection by update status or by whether an element is linked to Tableau. To do so, use the Filter Selection checkboxes: Read more
- Updates Available : Elements that don't contain the most recent Excel data and elements whose data sources are not yet loaded (see Reload data sources (
 ))
)) - Updated : Elements that have manual updates enabled and contain the most recent Excel data
- Automatically Updating : Elements that have automatic updates enabled
- Tableau Data Links : Elements that are linked to Tableau (see Tableau data links)

- Updates Available
- On the floating toolbar on the right side of the dialog, select the update option that you want:
- Update Once (see Manually update linked elements)
- Revert (see Revert updates to linked elements)
- Update Automatically (see Automatically update linked elements)
- Update Once


Note: thinkcell can't automatically update linked elements that are linked to Tableau (see Tableau data links). If your selection includes an element that's linked to Tableau, when you select Update Automatically , thinkcell updates the element once.
In the Data Links dialog, you can highlight and jump to linked elements in your presentation, and you can open linked Excel ranges from the dialog.
- To highlight all linked elements in your presentation, select Highlight Linked Elements on Slides. A green highlight appears on all linked elements until you close the presentation.
- To keep an element highlighted after you close and reopen PowerPoint, select the element placeholder, then on the floating toolbar, select Keep Highlighted on Slides.
- To jump to a linked element in your presentation, select the element placeholder. On the slide, thinkcell selects the element. In the Data Links dialog, thinkcell highlights the data source.
- To open an element's linked range in Excel, double-click the element placeholder.
Alternate data sources
When you link elements to cells in an Excel workbook, thinkcell assigns a data link ID to the linked Excel range. thinkcell uses this ID to load data from the linked range into its corresponding element.
When you rename, move, duplicate, or share the linked Excel workbook, the workbook's file path changes, but its data link IDs stay the same. When you open the workbook with the new path and the presentation at the same time, thinkcell detects another workbook with the same data link ID. Therefore, thinkcell offers this workbook as an alternate data source for the elements that are linked to the original workbook. Similarly, when you duplicate or rename a worksheet that contains a linked range, thinkcell detects this worksheet as an alternate data source.
An alternate data source doesn't automatically replace the original data source, even if the original source is no longer available. Elements stay linked to their original source until you link them to another data source.
When you end your Office session, thinkcell clears the list of alternate data sources. To make these sources available again in a new PowerPoint session, reopen the corresponding Excel workbooks.

In PowerPoint, the following indicate that thinkcell has detected one or more alternate data sources:
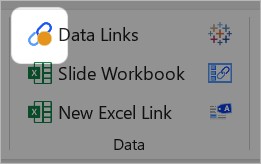
- An orange dot appears on the Data Links ribbon commands.
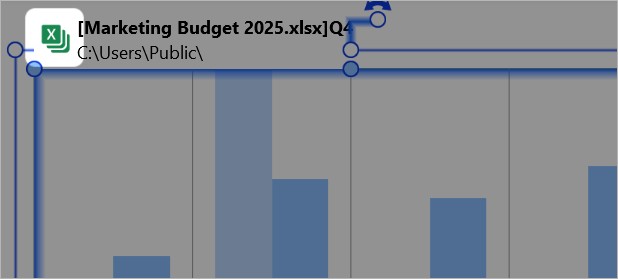
- A green alternate data source icon (
 ) appears in the following locations: Read more
- When you select an element that has an alternate source, above the element
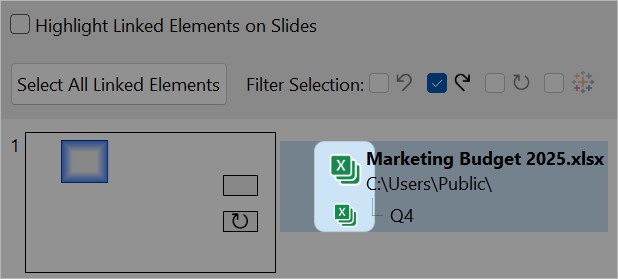
- In the Data Links dialog, next to data sources that have alternate sources
- When you select an element that has an alternate source, above the element


- The Manage Data Sources button appears in the following locations: Read more
- On the mini toolbar of elements that have alternate sources
- In the Data Links dialog, on the floating toolbar of elements that have alternate sources


In Excel, in both the original and alternate data sources, color-coded tabs appear under each of the matching data link frames (see View duplicate linked ranges).

Link elements to alternate data sources
When thinkcell detects alternate data sources, you can link elements to the alternate sources in the Manage Data Sources dialog. For thinkcell to detect an alternate data source, open the workbook while the presentation is open.
To link elements in your presentation to alternate data sources, follow these steps:
- On your slide or in the Data Links dialog, select one or more elements with alternate data sources (see Manage updates for multiple linked elements):
- To replace all links to an active workbook with links to an alternate workbook, select at least one element that's linked to the active workbook. Do not add elements to your selection that are linked to another workbook.
- To replace all links to an active worksheet with links to an alternate worksheet, select at least one element that's linked to the active worksheet. Do not add elements to your selection that are linked to another worksheet.
- If you only want to replace some links to a workbook or worksheet, select the elements that you want to link to the alternate source.
- With these elements selected, open the Manage Data Sources dialog. Read more
- To open Manage Data Sources from your slide, do one of the following:
- Above a selected element, select the green alternate source icon ( ).
- On the mini toolbar, select Manage Data Sources.
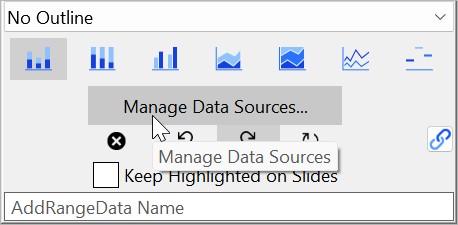
- Above a selected element, select the green alternate source icon (
- To open Manage Data Sources from the Data Links dialog, on the floating toolbar, select Manage Data Sources.
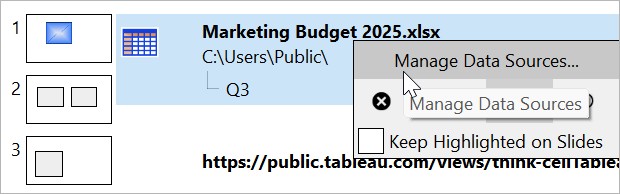
- To open Manage Data Sources from your slide, do one of the following:
- In Manage Data Sources, select the alternate data source that you want. Read more
The Manage Data Sources dialog lists all the available data sources for the elements that you selected. Data sources are grouped by workbook:
- The workbook file name and path appear first.
- Under each workbook is a list of the worksheets that contain the selected elements' data.
- Worksheets that are linked to the selected elements have the Active
 icon beside them.
 - Worksheets that are new alternate data sources have the New icon beside them.
- Worksheets that are linked to the selected elements have the Active
To replace links to an active workbook with links to an alternate workbook, select the alternate workbook that you want.
To replace links to an active worksheet with links to an alternate worksheet, select the alternate worksheet that you want.
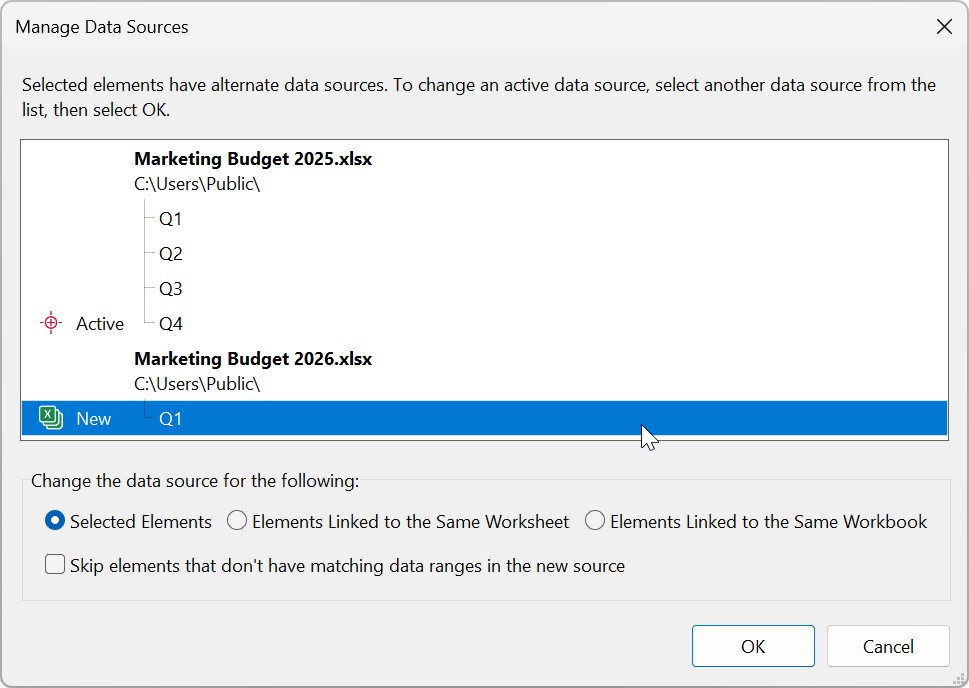
- Select which elements you want to link to the alternate data source.
- Selected Elements: Only link the selected elements to the alternate source.
- Elements Linked to the Same Worksheet: Replace all links to the active worksheet with links to the alternate worksheet.
- Elements Linked to the Same Workbook: Replace all links to the active workbook with links to the alternate workbook.


- By default, if the alternate data source doesn't have a matching data range for an element, thinkcell breaks the data link. If you instead want to keep an element linked to the previous data source when this happens, select Skip elements that don't have matching data ranges in the new source.
- Select OK.
To undo the changes that you made to data sources, select Ctrl+Z. Alternatively, on PowerPoint's Quick Access Toolbar, select Undo Last (see Microsoft Support).
Note: Selecting Skip elements that don't have matching data ranges in the new source keeps elements linked to their previous source only if the alternate data source lacks any linked cell ranges that match the element.
For example, consider the following scenario:
- The workbook
Budget 2025.xlsxcontains the worksheets Q1, Q2, Q3, and Q4. The worksheets Q2, Q3, and Q4 are duplicates of Q1. All four sheets contain different values in matching cell ranges—that is, linked ranges that have the same data link IDs - You duplicate
Budget 2025.xlsxand rename itBudget 2026.xlsx. In the duplicated workbook, you delete the worksheets Q2, Q3, and Q4. - You select all elements linked to
Budget 2025.xlsx, open the Manage Data Sources dialog, and selectBudget 2026.xlsxas the alternate data source. - You select Skip elements that don't have matching data ranges in the new source, then select OK.
Since the worksheets Q2, Q3, and Q4 were duplicates of worksheet Q1, elements that were linked to those worksheets will change their data source to Q1 in Budget 2026.xlsx, as Q1 contains matching cell ranges for the elements.
Troubleshoot data links
When you have linked elements in your presentation, thinkcell needs to load the linked data sources whenever you start a new Office session. If thinkcell hasn’t loaded the data source in the current Office session, to restore the data link, reload the data source. If thinkcell can’t open the data source, the data link is broken. The following sections explain how to reload data sources and manage broken data links.
 )
) 
When a linked element's data source is not yet loaded in the current Office session, an orange question mark ( ) appears in the following locations:
- Above the element when you select it. The tooltip includes the message "Not yet loaded."
- On the Update Available or Automatic Updates Enabled button
- In the Data Links dialog, next to the linked element's data source (see Manage multiple linked elements using the Data Links dialog). The tooltip includes the message "Not yet loaded."
To load the data source and restore the data link, follow these steps:
- Select the element.
- Do one of the following:
- Select the data source that appears above the element.
- On the mini toolbar, select Update Once or Update Automatically .
- Open the Excel workbook that contains the linked data. For example, double-click the element, or open the workbook using File Explorer.
If thinkcell can locate the linked Excel range, it restores the data link and the orange question marks disappear.
) 
If thinkcell can't open a linked element's data source, a red exclamation mark ( ) appears in the following locations:
- Above the element when you select it. The tooltip includes the message "File cannot be opened."
- On the Update Available , Update Once , or Automatic Updates Enabled button
- In the Data Links dialog, next to the element's data source (see Manage multiple linked elements using the Data Links dialog). The tooltip includes the message "File cannot be opened."
Common causes for broken data links include moving or renaming the data source.
To restore broken data links, change the data sources of the linked elements (see Link elements to alternate data sources).
Edit the datasheet of elements with broken data links
When unable to restore a data link, thinkcell stores a copy of the most recently used data from the linked data source in the element's datasheet (see Element datasheets).
If you open and edit the datasheet, then later link the element to an Excel range, thinkcell does not immediately update the element. This helps to ensure that you don't accidentally overwrite the data in the element's datasheet. After linking the element to the new Excel range, you can update the element with the new data manually or turn on automatic updates.
Remove data links
Removing a data link disconnects a specific element in PowerPoint from its linked cell range in Excel. When you remove a data link, the Excel data doesn't change. In PowerPoint, the element stays in the presentation, and its most recent dataset is stored in the element's datasheet (see Element datasheets).
When you remove a data link in PowerPoint, the linked Excel range keeps any other data links to other elements. When you remove a data link in Excel, you break all data links that use the linked range in PowerPoint (see Manage broken data links ( )).
To remove data links from elements in PowerPoint, do one of the following:
- Select one or more elements whose data links you want to remove (see Select objects). Right-click the selection to open the context menu, then select Break Excel Link
 or Break Tableau Link
  .
.
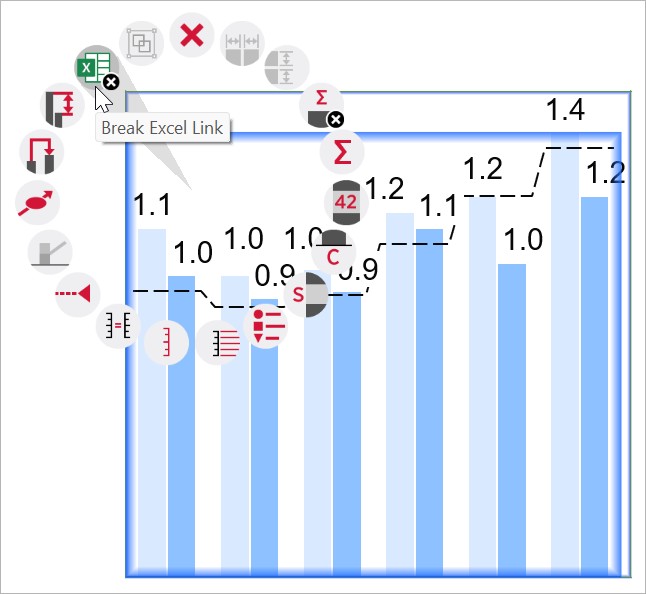
- In the Data Links dialog, select the placeholders of the elements whose links you want to remove (see Manage updates for multiple linked elements). Then select Delete, or on the floating toolbar, select Break Excel Link
 or Break Tableau Link .
 - To remove all data links to a specific Excel source, in the Data Links dialog, select the workbooks or worksheets that you want to remove. Then select Delete.

To remove a data link from an Excel range, do one of the following:
- Select the data link frame around the range, then select Delete.
- Right-click the data link frame around the range. On the context menu, select Delete


Remove broken data links in Excel
To identify broken data links, open both the Excel workbook and all the PowerPoint files that the workbook links to. All linked Excel ranges have a red frame when their linked PowerPoint files are closed. If a data link frame is red even after you've opened its PowerPoint file, the link is broken.
To remove all broken data links in the workbook, do one of the following:
- Right-click the red frame of a broken data link. On the context menu, select Delete Disconnected Links
 .
. - On the Excel ribbon, select Insert > thinkcell > Tools
Manage data links in thinkcell Essentials
If you have thinkcell Essentials, you can't insert thinkcell charts or other elements that are linked to data ranges into your presentation. However, if your presentation already contains linked elements, you can do the following:
- View linked elements in the Data Links dialog (see Manage multiple linked elements using the Data Links dialog).
- Find linked elements and open their Excel ranges.
- Select a linked element and see the data source information above the element (see View linked data source information).
- See the data link status above linked elements and in the Data Links dialog (see Troubleshoot data links).
- View and open alternate sources in the Data Links dialog (see Alternate data sources).
- Remove data links.
Excel data links FAQ
What happens when I copy linked elements?
When you copy a linked element, both the original and the copy link to the same Excel range (see Manually update linked elements).
What happens when I delete linked elements?
When you delete a linked element, you also remove its data link to Excel. If there are no other elements in an open presentation that link to the same Excel range, the frame around the range turns red. The linked range is not affected in any other way. To learn more, see Remove data links.
How do I get rid of the red frames in my Excel worksheets?
A red frame around a linked range indicates that there are no open presentations that contain data links to the linked range. Possible reasons for a red data link frame are:
- The linked elements are in a presentation that isn’t open.
- The linked elements or the presentations that contained them were deleted.
- The linked elements now use a different linked Excel range as their data source.
To learn more about how data link frames are color-coded, see Manage linked ranges in Excel. To learn how to remove data links in Excel, see Remove data links in Excel.
Why are my linked elements indicating a pending update even though the Excel data didn't change?
Even small changes in Excel data, such as changes to decimal separators or currency symbols, register as new data for a linked element.
If you see pending updates for a linked element when you are sure that there is no new data in the linked Excel range, check the element's datasheet. Pending updates might indicate that the element had a broken link, and you edited its data in the element datasheet before restoring its data link to Excel (see Manage broken data links ( )).
Why is Excel slow when I have lots of linked ranges?
Excel's automatic error checking process affects performance. You can improve Excel's performance by disabling automatic error checking.
- On the Excel ribbon, go to File > Excel Options.
- In the Excel Options dialog, select the Formulas tab.
- In the Error Checking section, cancel Enable background error checking.
I have a lot of Excel files to visualize with thinkcell. Can I run thinkcell in batch mode?
Yes, thinkcell offers functions to update charts with data from Excel ranges programmatically and to create entire presentations from templates. To learn more, see Automation with Excel data.
What are the advantages of Excel data links over Microsoft OLE?
Microsoft Office supports Object Linking and Embedding (OLE), which can link or embed Excel tables and charts in PowerPoint. Like thinkcell's data links, you can update linked OLE objects when their source data changes.
thinkcell's data links are designed specifically for data-driven presentation elements and offer these advantages over Microsoft OLE:
- The element remains a thinkcell element. Linking it to Excel does not replace it with an Excel object. You can format and edit a linked thinkcell element in PowerPoint like any other thinkcell element.
- The element remains editable without its Excel data source. thinkcell stores the element's latest data in the element’s datasheet, so you can still view and edit the data when the workbook is unavailable.
- You can link an existing thinkcell element to Excel without recreating it from Excel content.
- You have more control over updates. You can update elements manually, update them automatically when Excel data changes, or revert the latest update that you made within the current PowerPoint session.
- You can manage all links in the presentation from one place. The Data Links dialog lets you view all linked elements, filter links by update status, and select or update multiple elements by slide, workbook, or worksheet.
- You can switch multiple elements to another source. If a linked workbook or worksheet is moved, renamed, or copied, thinkcell can recognize it as an alternate source. You can switch multiple elements to the updated alternate source at the same time.
By comparison, a linked OLE object remains tied to its source application and external file. PowerPoint can update the OLE object, change its source, or break the link, but OLE objects do not provide thinkcell’s presentation-wide link management, update reversion, data mapping, or alternate-source workflows.
Need to troubleshoot?
Check our knowledge base